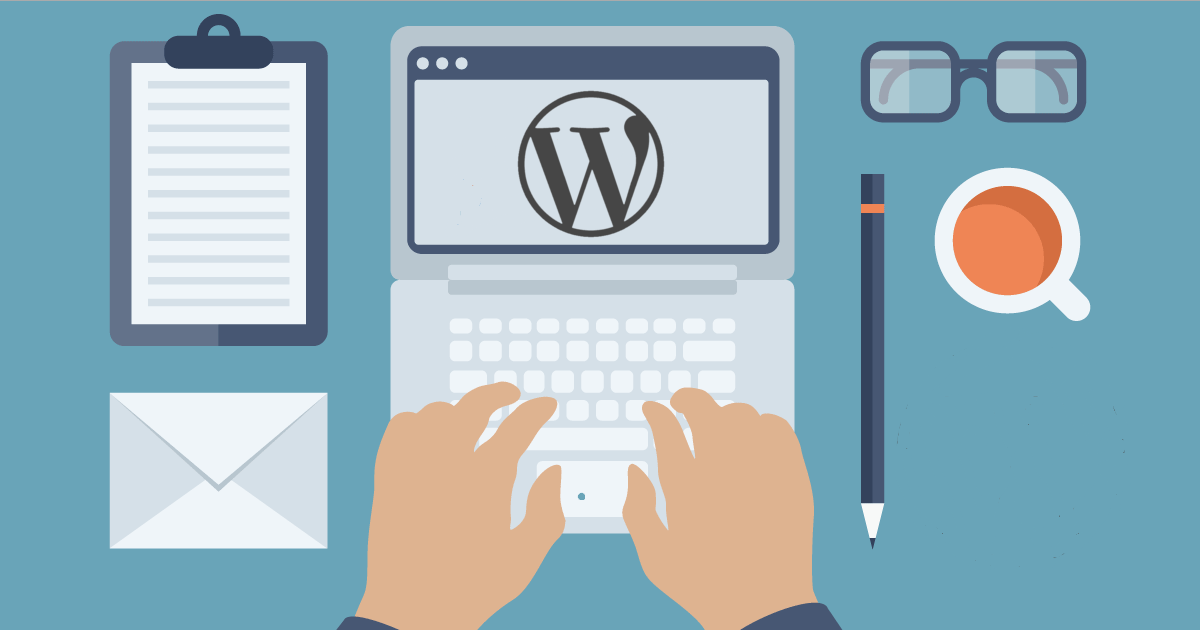
Learning how to create a WordPress site for the first time isn’t as hard as you would imagine.
BUT FIRST, WHAT IS WORDPRESS?
WordPress is one of the most common content management systems ( CMS), driving over one-third of all websites. Although that may sound complicated, it’s pretty easy. That’s what a content management system does — it manages how your content is displayed. Basically, you provide what you want to show on your site, and the CMS will take care of how it will be displayed. This means that a CMS is perfect for anybody who wants to create or manage a professional website without obtaining a new degree in computer programming.
Many different content management systems are available but we will be concentrating on WordPress. It is widely supported, easy to customize and free to use (except for hosting — more on that below). WordPress is a great way to build a flexible, polished website without learning to code.
WHO SHOULD USE WORDPRESS?
In short, anyone wanting a website that is easy to maintain but highly customizable should learn how to build a WordPress website. WordPress is often thought of as a blogger platform, but it works well for many different website types. A small business that needs an online advertisement presence, a family who wants to keep loved ones up-to-date with images and news, and the professional who provides their services to the public may benefit from WordPress. And yes, blogs work well too.
HMM, BUT HOW DOES WORDPRESS WORK?
Think of it this way; WordPress is your system. Just like a home, you start with the framing first. Think of WordPress as the website’s skeleton. WordPress is the backbone and offers the resources you need for all the essential functions. Next, we complement the material. This includes text, photographs and videos that you use to express your message to tourists. The furniture, pictures and items within your site are in our house analogy. Your theme controls how your site looks; your theme includes overall colors and page layout. These are your house paint and carpet of your website. However, when you’re learning how to create a WordPress website, what will you do when you want to change your color schemes and rearrange your furnishings? You don’t want a whole new house to buy just to change its look. Here’s where building your WordPress website offers a huge advantage. Upon initial set up your content, you can change your template without rewriting your pages.
The good thing about WordPress is that you can easily edit content, add features or completely redesign your site without having to start over from scratch.
OKAY, WHAT DO I NEED TO BUILD A WORDPRESS WEBSITE
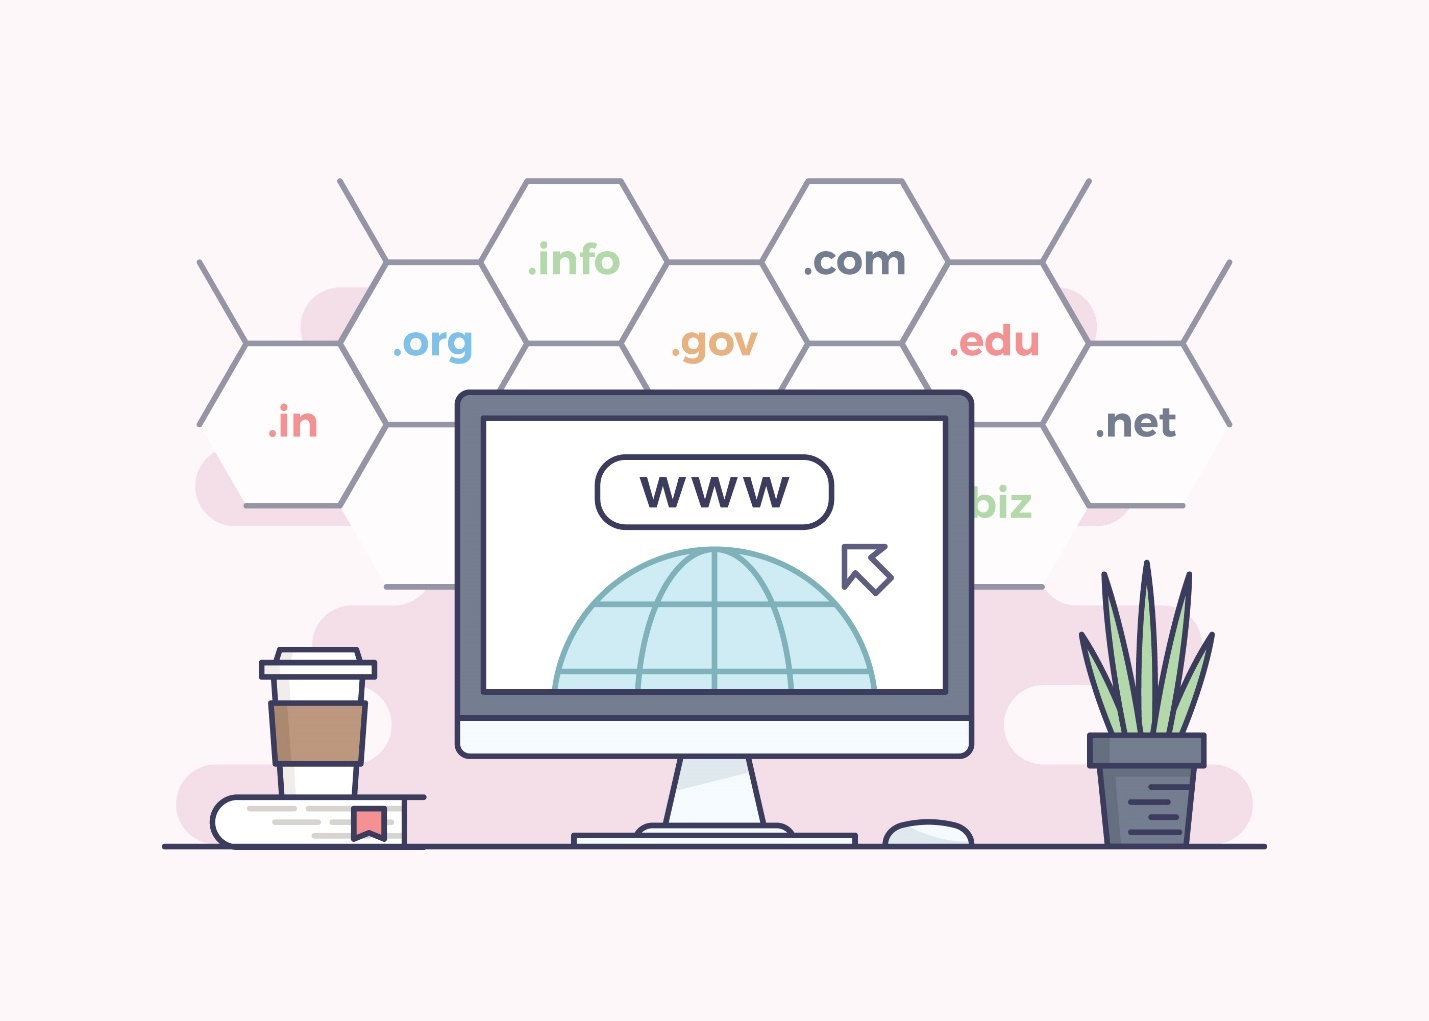
Let’s get down to the nitty-gritty: what does it take you to start? — website needs two main components: a domain name (also called your URL or the address of your website) and hosting. The domain name is how people access your site, and the hosting refers to the physical computers which store and serve the files of the website. A word of advice: stay with a renowned hosting agency. In the long run, “discount” hosting can cost you far more. Begin by securing the hosting and the domain name.
A hosting account, GoDaddy WordPress Hosting would be a great place to start. On such plans, WordPress is built and configured automatically. And with managed hosting, you will be handled with tasks such as automatic core software updates, website backups and malware scanning.
If you decide to go with an unmanaged hosting plan and install WordPress on your own, you can download WordPress.org’s latest version. Any hosting plan will work as long as you have access to both a value-saving database and a file-uploading location. Below we must cover installation by ourselves.
THE EASIEST WAY TO BUILD A WORDPRESS WEBSITE
The easiest way to set up WordPress is to start with a WordPress website-specific hosting account. For example, if you choose a plan such as the GoDaddy Managed WordPress Hosting account, you already have WordPress installed.
HOW TO INSTALL WORDPRESS MANUALLY
We’ll need to do a little bit of setup work before you can install WordPress. Let’s get WordPress enabled manually.
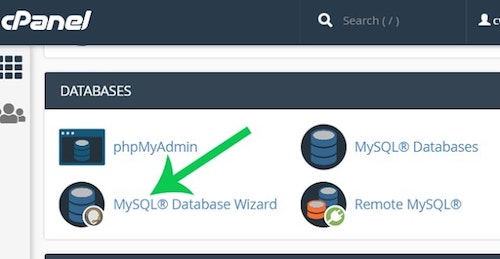
CREATE A DATABASE
First, we’ll create a database. A WordPress website varies slightly from what we used to think of as the “normal” website. Even when the web was fresh (you know, when dinosaurs roamed the earth), websites were just a series of files stored on a disk. WordPress operates differently; your site is generated from a combination of files stored on a server AND data stored and accessed from a database; This means we need to set up a WordPress database for use.
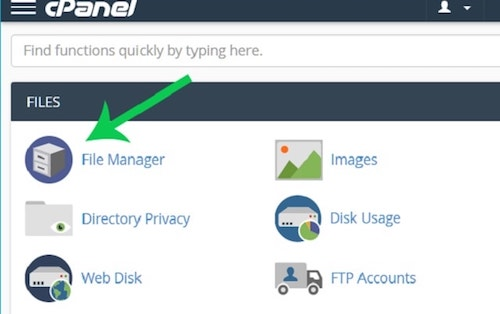
You should have received credentials to log into your control panel, or cPanel, for hosting. Once you log in, there are several options you should see on your administrative dashboard. We want to start by locating the section Databases; using the MySQL Database Wizard, we will create a database.
Follow the Wizard prompts to create your database. You must assign a name for the database and create a password user of the database. Assure that the user has “All Privileges” to the database when prompted. Note the name of the database and the username and password that you set — in a minute; you’ll need these.
2. UPLOAD THE WORDPRESS FILES
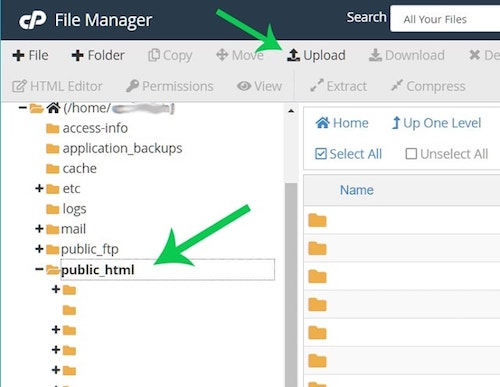
Next, we will set up the files every WordPress requires. Download the revised WordPress edition from WordPress.org. Return to the dashboard of your cPanel, and click on the File Manager.
Click on the public html tab. This is where you want your files to be set up. Click Upload and upload the WordPress.org zip file that you just saved.
Return to the main File Manager window once the file is finished uploading. Right-click the file and select “Extract” to unpack all the files WordPress needs into your working directory (be patient, this part can take a couple of moments to complete). Once finished, under your “public html” folder, you’ll see a “WordPress” directory. Click that folder and select all files inside.
Click the Moving button at the top of your screen and push all the files into your pubic html directory. You can remove the folder “WordPress” and the original WordPress zip file, which is now empty. If you did everything right, you should have a file structure that looks like this:
3. INSTALL WORDPRESS
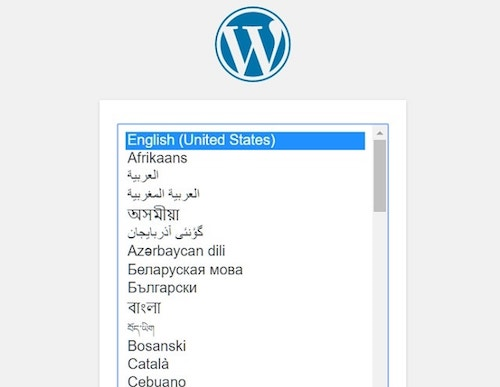
Go to a web browser for the final step, and visit your website at any domain name you have chosen. The installation process should start for you automatically by prompting you to select a language.
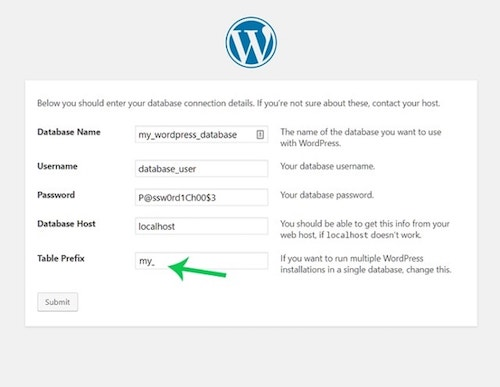
4. ENTER YOUR DATABASE CREDENTIALS
Remember, we the saved credentials earlier? This is where you need them. In the appropriate boxes, enter the database name, username, and user password. Most hosts will use the hostname for the localhost.
If you are confused, the information can be given by your web host. Changing the default table prefix from wp into something different is also a good idea. It doesn’t matter what you choose. Click Send to continue with the installation.
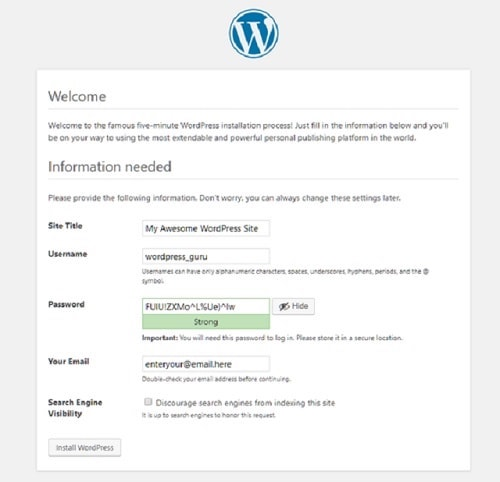
5. SET USERNAME AND PASSWORD
You’ll now set the username and password you’ll use to log into your new WordPress site. Using a username other than “admin” is a smart idea. It is the default username and therefore raises the likelihood of hacking the account later. Select a safe password, or let WordPress generate one for you. Give a title to your website and continue installation, if you wish.
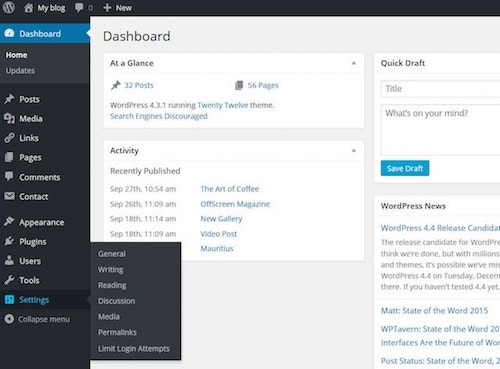
GETTING TO KNOW THE WORDPRESS DASHBOARD
This dashboard is the foundation of WordPress for all things. Where to go?
Let’s start with a quick overview of the various areas you can use to add content to your site and set up WordPress. You will build up the bulk of your website using posts and pages. In general, posts are used for material that is regularly updated, such as blog entries. It is easier to use Pages for materials that don’t change much, such as a connection to About Us or Contact Us.
By default, most themes will show your latest posts on the homepage (think blogs). However, if you wish, you can adjust the setting to display a static page. This option, along with other options — such as setting your time zone or changing the administrator’s email address — can be found under the Settings tab in the left menu.
The appearance menu is where you’ll control your theme and everything related to your website’s visual display. You can then pick and upload themes, build menus, and specify what the widgets will display in your sidebar.
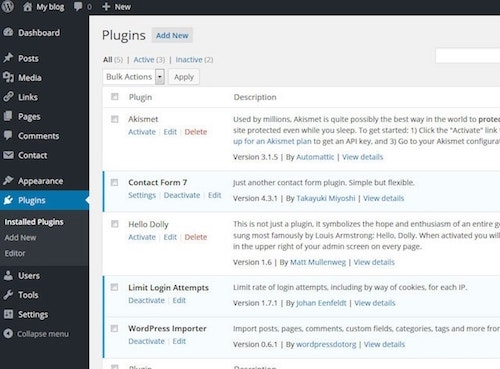
The Plugins menu lets you view installed plugins and add new ones. This page shows any plugin currently installed on your WordPress website. However, only allowed plugins can be used on your website.
A new menu item will often be added to the left-hand menu when you install a plugin (themes will add certain menus as well). Further, new options are added frequently to one of the existing menu items.
The Media Library is where pictures you have added to your WordPress website can be accessed, edited, or removed. All images will appear in the media library no matter where they are added. You can, for example, add an image directly from the post or page. Those pictures will still appear in the gallery. If you add an image to the media gallery directly, it can be accessed from your site’s web section.
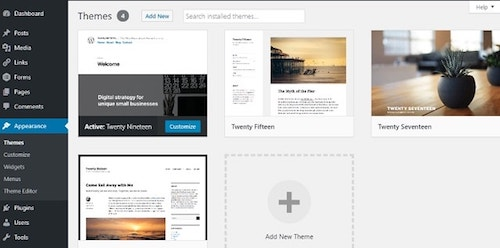
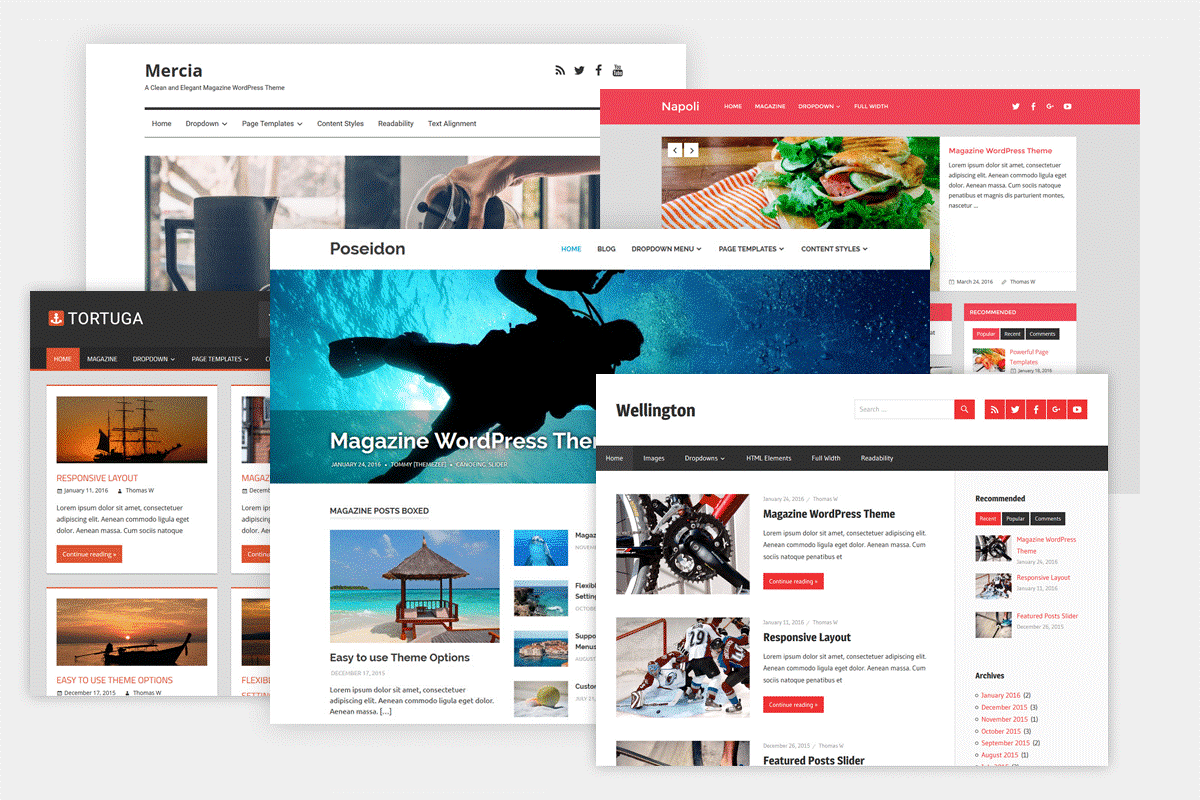
CHOOSING A THEME FOR YOUR WORDPRESS WEBSITE
Although the content is the most critical piece of building a WordPress website, you should pay close attention to your theme. The theme affects how your site is displayed and how it gives your visitors an overall impression.
There are many things to consider when selecting a good theme, but when you are not a web designer, everyone can learn how to design a website. Overall, you want a safe, clean and easy to work with theme. You also want to select a responsive theme (meaning it will handle different screen sizes, such as tablets and mobile devices, and desktops). Furthermore, several themes are highly customizable, so you can easily adjust colors and backgrounds. This can help you achieve a unique look that best suits your idea of designing your website.
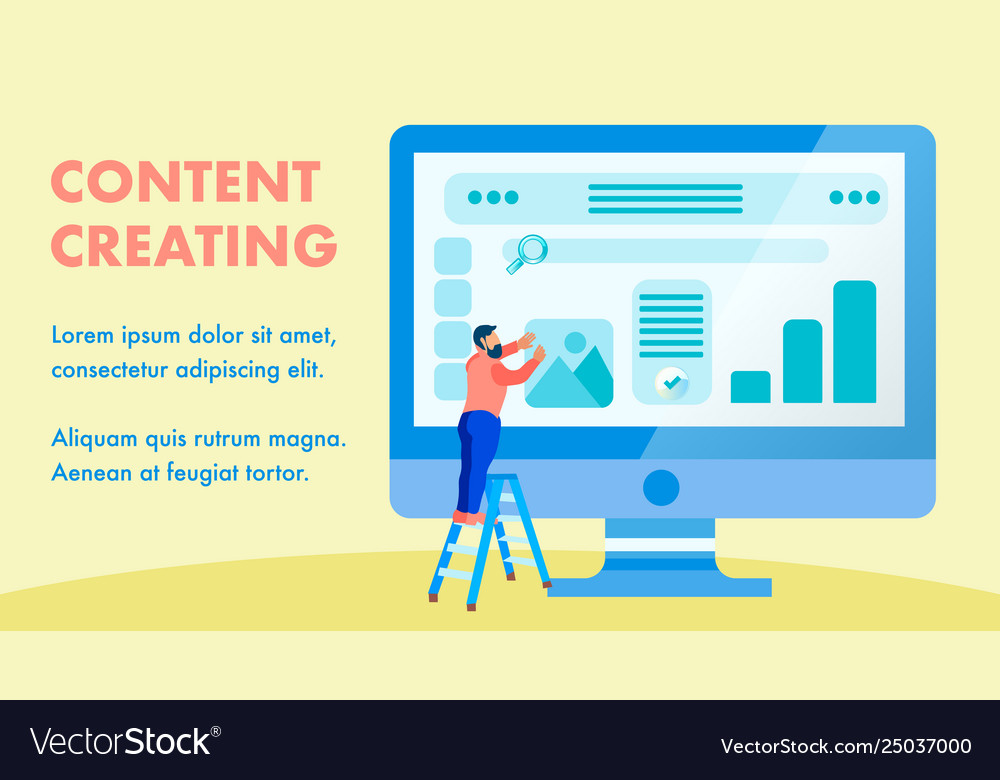
ADD CONTENT TO YOUR WORDPRESS WEBSITE
As I mentioned earlier, almost all content is added to WordPress via a post or a page. With the introduction of WordPress 5.0, the way the content on a page was entered changed drastically.
Here are a few tips to remember when you work with the material.
You will see some additional options along the right-hand side. For example, setting a featured image sets the thumbnail image automatically, which goes along with posts in many themes.
If an element is not yet completed, you can also save it in draft format. It saves the updates to the website but does not make them online. Only published posts and pages will be visible.
There is so much that we have barely scratched the surface for WordPress to do. Ready to do more? You can find out how to optimize your SEO website and learn everything you need to make your WordPress website safer.
Once you have your WordPress site that looks and works the way you want it, share it with the world!
But to know these systems, you initially have to know the jargon.
The easiest method, as everybody also discovered quality, is always to select the straight without having spread.
Finally the overall feel with the site is good
but offers nothing groundbreaking.


But to know these systems, you initially have to know the jargon.
The easiest method, as everybody also discovered quality, is always to select the straight without having spread.
Finally the overall feel with the site is good
but offers nothing groundbreaking.
Thank you for your feedback!
It’s amazing in support of me to have a website, which is beneficial in support of my
experience. thanks admin