Building a Bluehost website is easier than ever before. You can create your website with Bluehost’s beginner’s guide in just a few minutes. One of the great things about building a Bluehost website is that you don’t have to be an advanced programmer or coding expert to develop your website. Bluehost provides website builders that are easy to use, enabling you to build and improve your website in just minutes.
Before we get started, I want to go over a little bit about Bluehost and why choosing them is a good choice when building your site. Bluehost has over 2 million websites and over 850,000 blogs around the world. They have a 99.9% uptime guarantee, which means you don’t have to worry about your site’s downtime.
Bluehost offers a 30-day money-back guarantee and provides 24/7 customer support. Another great thing about Bluehost is that they’re cost-effective.Let’s get started with our guide on how to build a website with Bluehost. To start, we want to sign up with Bluehost.
Visit www.bluehost.com to get your hosting plus a free domain name. You will be on the Bluehost home page. Click the green Get Started button. You’re directed on the Bluehost page, where you can choose between four different Bluehost plans. You can choose between Basic, Plus, Choice Plus and Pro.
The Basic Plan works fine for most of them. This plan is useful if you’ll have one website. If you want to have unlimited email accounts or have more than one website, you’d like to join the Plus plan. The Plus Plan comes with Spam Experts and a free 30-day trial of Office 365 mailbox. Spam Experts is an email filtering system that scans emails coming in to ensure no viruses or spams are coming in. The Office 365 mailbox is optional, but it might be worth trying if you’re going with this plan.
The Choice Plus plan comes with all of the features that the Plus plan comes with and more. The Choice Plus plan comes with the addition of the Bluehost add-ons Domain Privacy + Protection and Site Backup – Codeguard Basic.
Domain Privacy + Protection keeps your personal contact information secure so as not to let telemarketers get in touch with you by selling your services or spammers. Site Backup – Codeguard Basic is an add-on that backups your site every day and allows you to restore your site by clicking a button. If something happens to your website, you can quickly get it back to the way it did.
I’m not recommending the Pro plan from the get-go. Ifyou need to upgrade to this plan once your traffic and revenue grows, recommend that you upgrade to it. The Pro plan comes with everything that comes with the Choice Plus plan and the Dedicated IP and 2 Spam Experts that allow two of your email addresses to have a spam filter.
The next step in how to build a Bluehost Guide website is to choose a free domain name. You will see where you can select and create a new domain, enter a domain name that you already own, or later create a domain name. If you choose to create a free domain name then, you can do so from your Bluehost account. If you already have your domain name from another provider, you can type it in and click the next button.
Next, I’m going to walk you through your free domain name. Enter the name of the domain you want. You’ll see where you can choose your domain extension, where you can see the.com drop-down. I recommend that you go to.com if you can, as this is the most popular domain extension.
Most people use.com sites to make it easier for your site visitors to find you if they type in your specific URL. The.net domain extension is another popular and good domain extension to use. The domain extension you ‘re going with is entirely up to you. When you have a domain name that you want, click the next button.
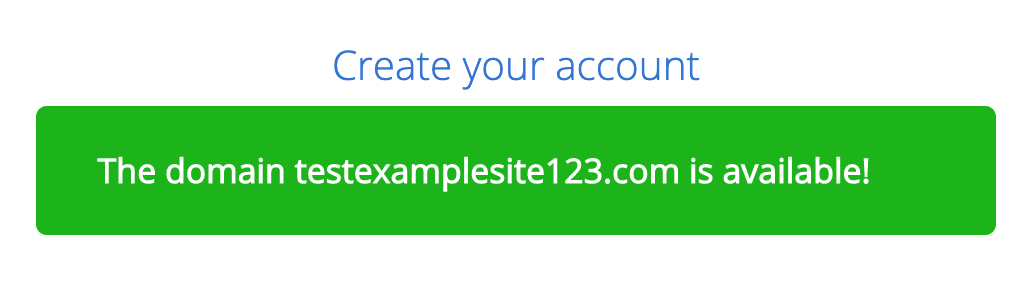
Bluehost will now let you know whether or not the domain name you have chosen is available. If it’s available, it’ll say it’s available.
If your domain is unavailable, it will let you know. If your domain name is not available, you can search for a new domain name. If you want to have the domain name you entered, you can try using a different domain extension, add a-, add another word to the domain name.
If you bought your domain name from another provider, you would need to point your name servers to Bluehost. If you purchased your domain name with GoDaddy, here’s a post about how to point your GoDaddy domain to Bluehost. Have you bought your domain name from Namecheap? Here’s a post about how to point your Namecheap domain to Bluehost.Next, put information on your account.
Right under the Account Information section, you will see the information for the package.
Next, we’re going to choose a hosting term. Click the drop-down next to the account plan. Account plan is where you’re going to choose your hosting term. You’ll see 12, 24, or 36 months. You’ll see that the price per month is cheaper the farther you’re buying your Bluehost hosting. You’ll see that the domain name registration is free along with Let’s Encrypt SSL.
If you don’t know what SSL is, SSL protects your customer’s information from malicious hackers, such as their password, username, and credit card information. Search engines like Google will rank higher sites that use SSL because this is one of the ranking factors. To know if the site is secure, you can go to the site and look in the browser and see HTTPS instead of HTTP before the domain name and the green lock icon.
You will now see a few add-on services that Bluehost offers under the next section, Package Extras. These are entirely up to you to get. You can add any of them at a later date if you aren’t sure about them now. Next, enter your payment information. Make sure you select the I have read and agreed to Bluehost’s Terms of Service. Click the green Submit button.
Bluehost will email you your Bluehost login details along with some welcome emails. One of Bluehost ‘s emails will ask you to verify your domain name. Make sure you do this, so your domain name won’t be canceled at a later date. If you have purchased your domain name from another company, you don’t need to worry about this email.
Next, when you start a website using the Bluehost Guide, you will be asked to create a password. Click the button to create your password.
Now you want to enter a password that you want to use for WordPress. WordPress is the builder of the Bluehost website that I will use to build a Bluehost Guide website.
Don’t you want to build your website with WordPress on Bluehost? No problem at all. Bluehost is currently offering more than 55 website builders to build your site. Login to the Bluehost cPanel to choose another website builder.
However, using WordPress is a better idea. So, WHY START A WORDPRESS WEBSITE WITH BLUEHOST?
I want to point out why you should choose WordPress to build your website. It is because WordPress is used not only by this blog but by a fortune 500 company around the world. WordPress now powers more than 30% of websites, and that number is growing every year. As you can see, these are some excellent reasons why you need to install WordPress on Bluehost. I recommend WordPress as the creator of your Bluehost website. Let’s continue with our guide on how to build a Bluehost WordPress blog.
You’ll see a congratulations page after you’ve created your WordPress password. Click the blue login button to continue and choose a free WordPress theme for your site.
Bluehost will give you a selection of some great free WordPress themes to choose from for your site. You’ll see a skip button under these. Feel free to skip this step if you want to. If you see one you want, you can choose it, and change it a little later.
WordPress.org is a great place to find free WordPress themes. Your directory has hundreds of free themes to choose from for your website. Later on, I’ll show you how to choose free WordPress themes right in WordPress.
If you find yourself struggling to customize and build your WordPress website on Bluehost, Themeforest is a great place to get premium WordPress themes that look like an award-winning design agency designed for your site. I recommend that you check them out.
After you choose a free WordPress theme from Bluehost or you skip the step you will see a page that says you’re all set, start building. Click the Start Building button to continue in building your WordPress website using Bluehost.
After you choose a free WordPress theme from Bluehost or skip this step, you will see a page that says you’re all set, start building. Click the Start Building button to continue building your WordPress website using Bluehost.
You will now see some WordPress dashboard tools in Bluehost. These tools are beneficial when you build your Bluehost website. You can add new website pages, blog posts, add WooCommerce if you plan to sell products, and customize your site’s menu.
A button should pop up that says launch your blog. You can easily name your site title and site description here.
In the left menu, find Appearance. Move over it and you’ll see Themes. Click Themes.
Next, click Add New to pull up free WordPress themes to choose from.
You’ll see free WordPress themes from where you can browse and select. One can pick from thousands of themes. By searching in the search box to the right, you can look through featured, most popular, latest themes, and favorites.
When you find a theme you like, hover over the theme and click Install. Once the installation of the theme is done, click Activate to activate the theme you have chosen.
If you purchase and download from Themeforest a Premium theme, you can upload the Premium WordPress theme from the page where you can select from the WordPress themes. Click on the top of the page to upload this theme.
Now I want to cover how to create a Bluehost web site. It’s not hard at all to design a website on Bluehost. Now, you want to start customizing, designing and constructing your website using the theme you have chosen.
I recommend the most famous drag and drop editor, Elementor, to make your experience in building your WordPress website nice and simple on Bluehost. Elementor has more than 4 million active installations and makes it easy to create a website. Elementor has a free and paid version. The paid version has more features, but the free version is super valuable.
A great plugin to add when you want to use Elementor is Envato Elements – Images & Elementor Models to make a website on Bluehost go even smoother. The image below shows how the plugin looks like.
The plugin has tons of pre-made template blocks to choose from for any website type.
This ends our step-by-step manual on how to start a Bluehost website. I hope you’ve enjoyed my beginner’s guide on how to create a Bluehost website. Let us know if you liked this post in the comments below! We ‘d love to hear from you.