Need to create a web site quickly? Instead of choosing a service like Wix or SquareSpace where you don’t own your website, look for an option where your content is fully controlled and owned. Today, we’ll teach you how to build a website in three simple steps.
SETUP YOUR DOMAIN AND HOSTING
You need to select a domain and get web hosting configured before adding images and text to your site.
Domain Name: Domain name is the address that will be used by visitors to access your site. The domain name for Apple, for example, is apple.com. You can buy a domain name easily at a small annual fee.
Web Hosting: Web hosting is the service that stores all the files on your website. A website will not be live on the internet without web hosting.
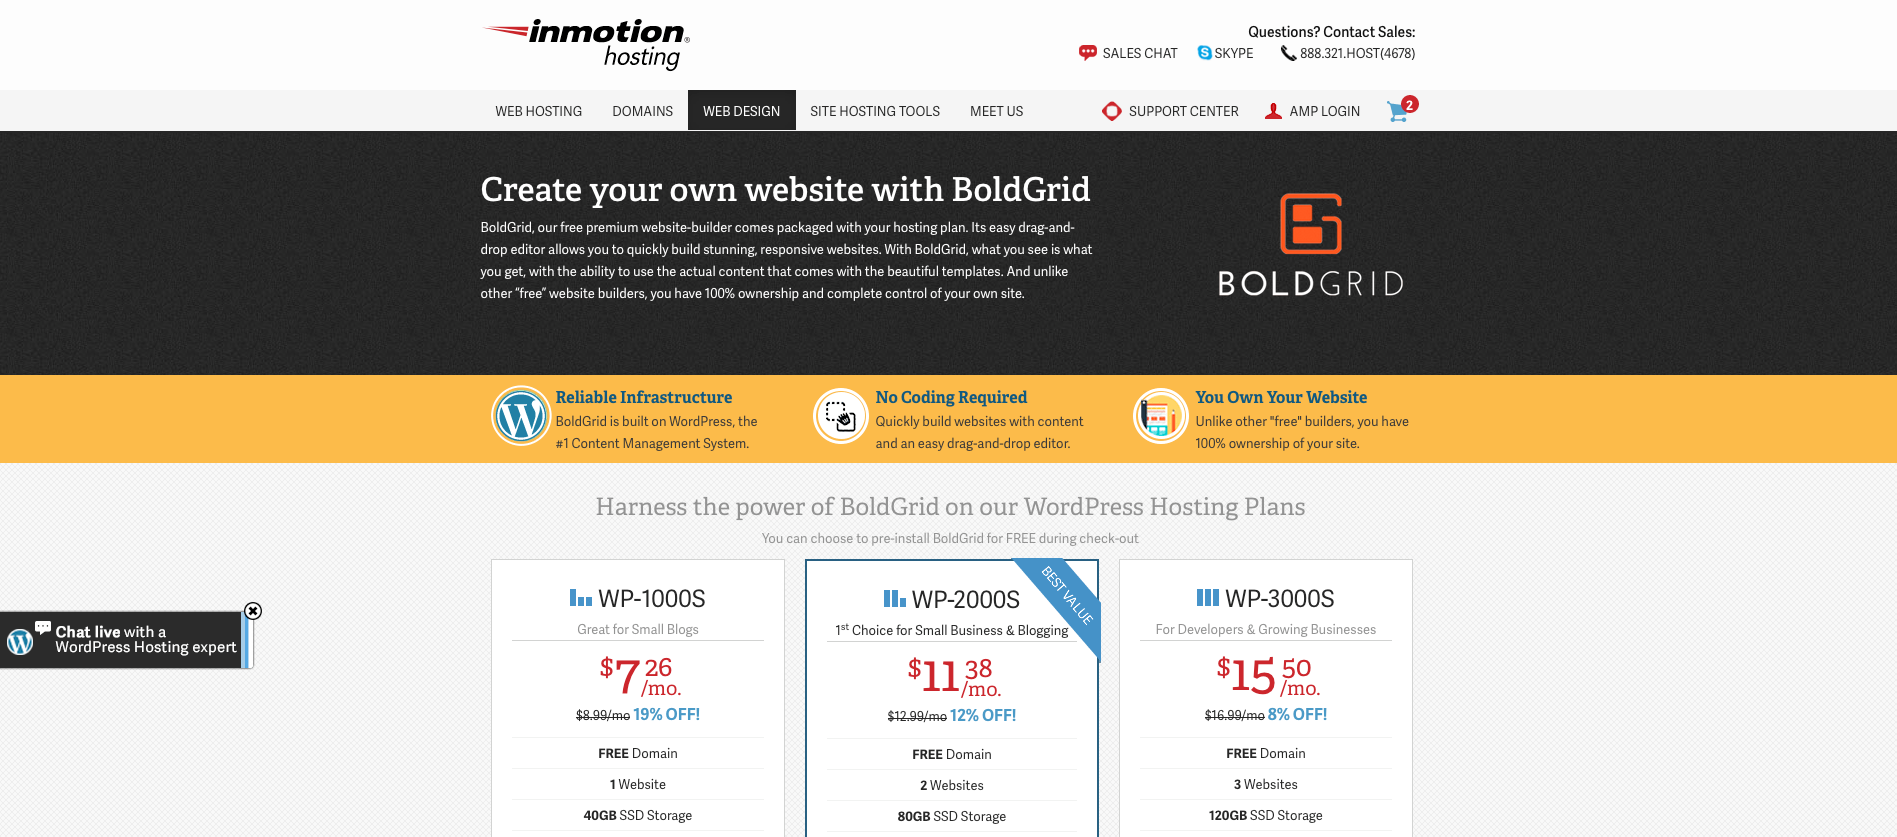
It’s not as hard to choose a domain name and a web hosting plan as it sounds. Let’s go first to the “Create Your Own Website” page.
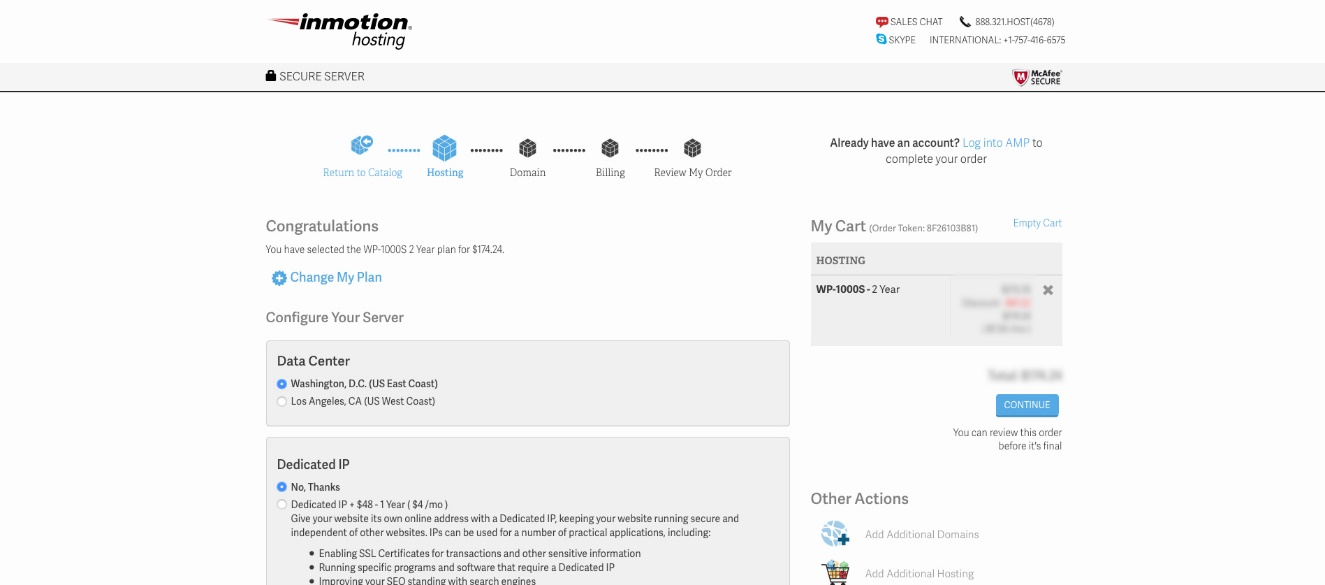
You’ll see three different hosting options to choose from once you’re in there. The “WP-1000S” will give you the power you need if you’re just getting started. We recommend that you choose the two-year plan as it gives you the most value for your purchase.
You will see an option under the “Other Actions” header that says “Add Additional Domains” after selecting that hosting plan. Go ahead and choose this option. You will be taken to a page where you can choose the domain name you want.
After selecting the domain name, go ahead and add it to your cart, you’ll see the domain is added at no charge. You will be asked if you want Domain Privacy after clicking “Continue.”
Domain privacy is critical because, without it, your details for spammers, telemarketers, stalkers and identity thieves would be published on the public Internet Company for Assigned Names and Numbers (ICANN) website. Domain privacy covers your information.
You will be asked to fill out your name, address, email address, telephone number and payment information after selecting the domain privacy. Once you complete filling out this information, wait for a phone call to verify all of your details. Once this is complete, you will receive an email with a link to set up your account password.
2. INSTALL BOLDGRID
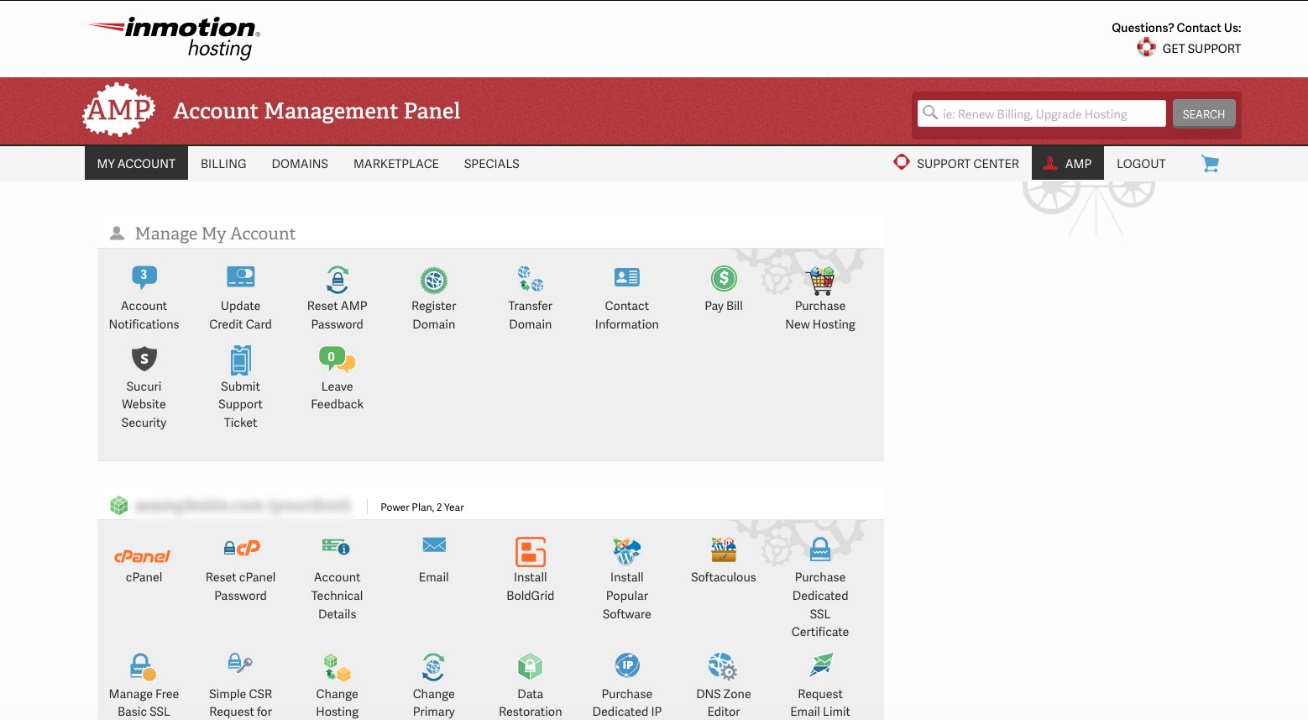
Once you’ve set up your Account Management Panel password, you can log in. Once logged in, you will be taken to your main account page. On this page, you will see an icon that says, “Install BoldGrid.”
They partnered with BoldGrid, a company that offers a variety of plugins and focuses on developing tools to ease the process of building the web. Let’s go ahead and click on the ‘BoldGrid install’ icon.
It will then give us three options:
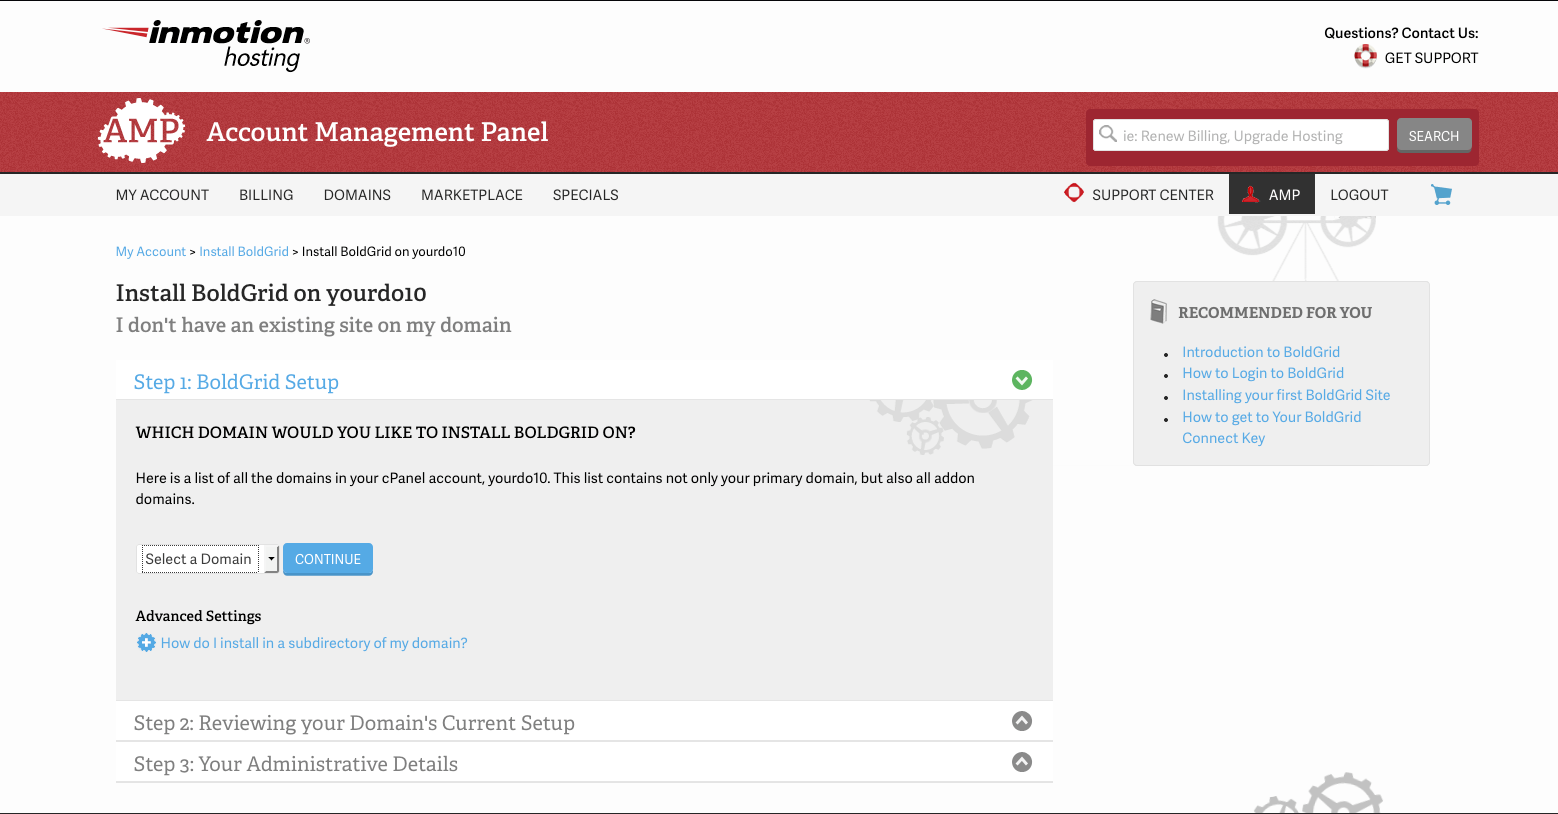
I don’t have an existing site on my domain.
I already have an existing site, but it’s not built with BoldGrid or WordPress.
I already have a WordPress site.
Since we’re just setting up this account, the first option will be selected; “I don’t have an existing site in my domain.” Then it will take you to a three-step process. The first step is to select the domain you want.
After selecting your domain and clicking “Continue,” it will check over your domain’s setup.
It will sometimes display a message saying BoldGrid is installed in a testing environment. After that, you can officially proceed and publish your website.
The last step is to have the administrative details entered. In this section, the details you receive will be the username and password that you use to log in to your website. Click on the “Install BoldGrid” button after entering your information. Installing BoldGrid on your domain takes a couple of minutes then.
Once it’s complete it will take you to a page with all of your installation details.
Before going into the next stage, we suggest you take a minute to write down your username, password and login URL. All that information will also be sent to you by email.
DESIGN AND LAUNCH YOUR WEBSITE Congratulations, you made it to the last step of building your website and launching it. If you have any questions or concerns about this phase before we begin this final stage, please leave a comment below and we’ll be sure to get it answered.
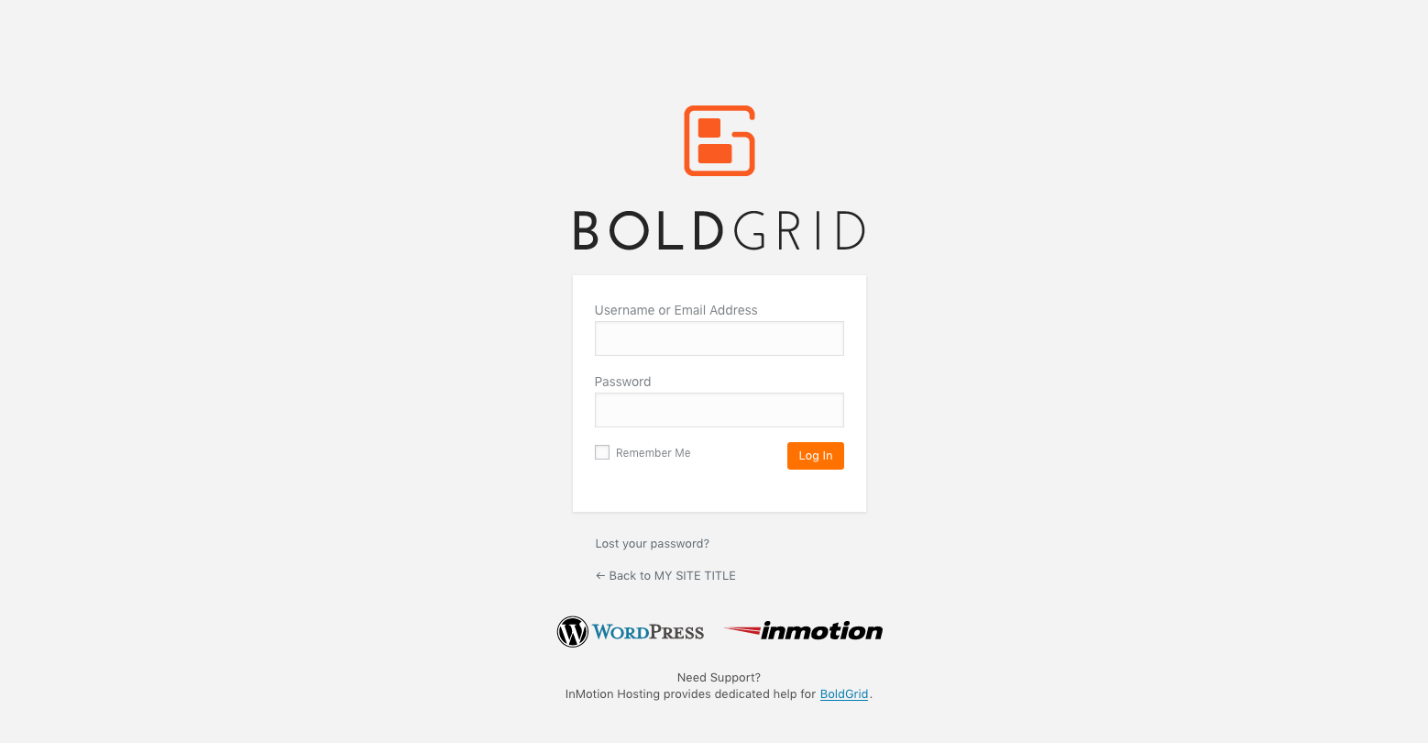
First, go to the login URL shown after BoldGrid’s install. Something would look like yourdomain.com/wp-admin. Upon reaching the page, you’ll see a login field. You’ll want to enter the username and password that you entered while installing.
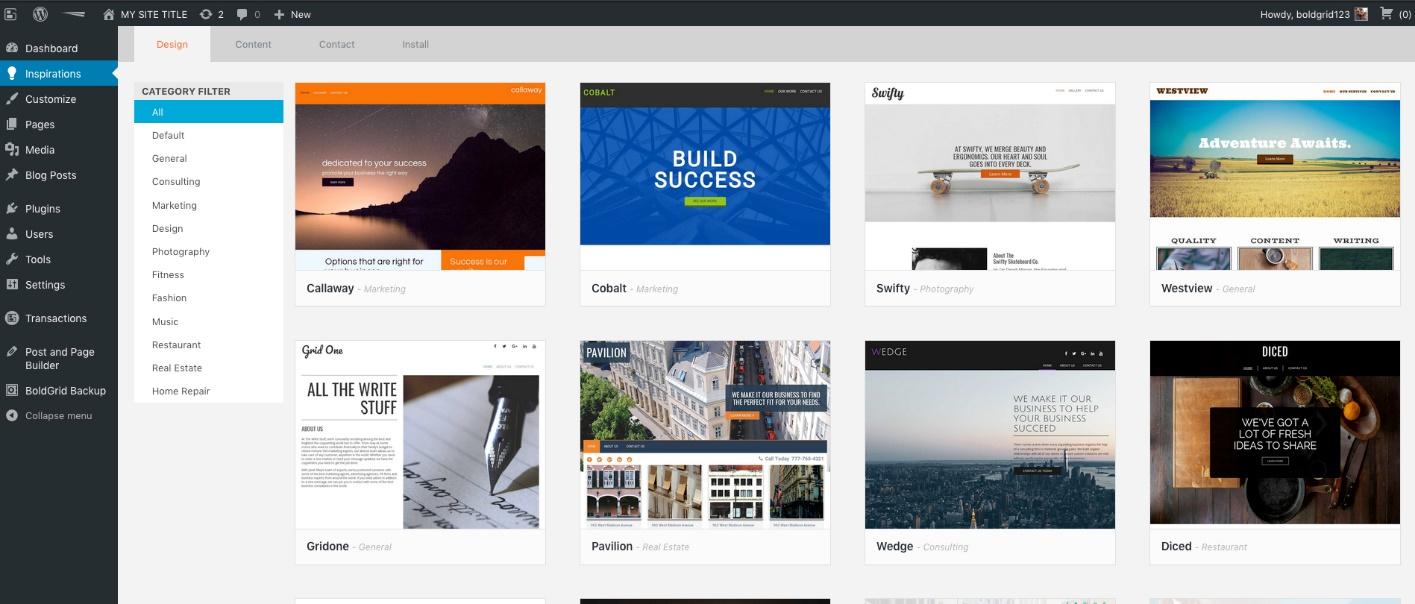
You will see some welcome material once you sign in that can help you get a better idea of how easy it is to design and build your website. Once that information is finished, let’s click on the ‘Inspirations’ tab on the left.
You will arrive at a whole list of different inspirations that you can choose. You can click on any of them and view them in a larger preview. Go ahead and take some time to find a theme that suits how your website would look.
The Pageset menu allows you to choose different styles of the page. The budget area of the coin is where you can purchase professional photos to go on your website.
Let’s go ahead and click the button “Next.” Then, we’ll be asked what we want to name our website, along with some further details. Let’s put in the blanks the correct information and click ‘Next.’
It will send you a little note letting you know some final information before your Inspiration is officially installed. Let’s go further and click the button “Install this website.”
Now you can see BoldGrid, install the template and check your website. Once complete, a “Customize” button will appear. Let’s get our website planned.
Now you’ll see a menu on the left, with your new website to the right. You can click on the menu options and make changes and you’ll see the changes made live! You’ll see a little pencil icon above your page, too. Feel free to press certain ones to make adjustments. Whenever you are ready to save them, press the “Publish” button.
There is a pencil icon on this specific theme, which, when picked, highlights the entire website’s remainder. For the rest of the screen, this is the edit button. You will get a popup “Edit this page” when you click it. Next, click the “Go There Now” button.
This will take me to the homepage where I can now drag and drop all of this page ‘s content.
If I want to change text, I can just click and type.
If you want to change a picture, you can hover over the row menu, and click the option ‘Change background.’
Now that I’ve given you a quick overview, go and try it. Go wild, and drag and drop elements to make the website you can only imagine.
Congratulations!
You have created a website using the power of InMotion Hosting, WordPress and BoldGrid. Do you have any further questions? Leave them in the comments below and we will be happy to have those answered for you.