Welcome to a more detailed guide on how to create a website. Today, we’re going to discuss how to create one using Website Builder from A2 Hosting. This intuitive, skilled software solution intends to help you quickly and easily build attractive websites. It requires little to no technical knowledge, allowing users of every ability to create a website in minutes directly within your web browser. If you want to run a personal web site, a pet blog, or an eCommerce shop, the answer is the A2 Website Builder!
3 SIMPLE STEPS TO CREATE AN ATTRACTIVE WEBSITE
CHOOSE YOUR TEMPLATE – The A2 Website Builder has a range of pre-designed templates from which you can choose. Each of these templates can be fully customized so that you can easily update the layout and color scheme.
CREATE YOUR CONTENT – Use the easy to use interface of A2 Website Builder to add your custom content. Add text, images, headlines, photos, pictures and everything else that you want to add to your site.
PUBLISH YOUR SITE – Publish your website to your domain with a mouse button. If you decide you want to make a modification, you can edit it further at any time.
A2 WEBSITE BUILDER FEATURES:
Some website-building solutions are particularly skilled in certain areas but require you to use different solutions to complete your site because other key areas are lacking. But not the Builder of the A2 website! It’s a comprehensive solution designed to provide you with all the tools you need to create a custom website you and your audience will love! Its tools include:
Pre-designed, customizable templates
Drag & drop editing
Easily customizable text
Easy image uploads and editing
eCommerce capability
Videos
Sign up and contact forms
Search engine optimization
Social sharing
GETTING STARTED WITH THE A2 WEBSITE BUILDER
To get started, visit the A2 Website Builder page to pick and purchase your chosen plan.
Do you already have an existing Shared Web Hosting account at A2 Hosting with cPanel? You already have access to the A2 Website Builder. Just click the A2 Website Builder icon in your cPanel account to get started with the website builder’s free 1-page, 14-day trial. To upgrade to a full A2 Website Builder account, just click the yellow upward point arrow found in the builder’s lower-left corner.
CREATING AND PUBLISHING A SITE WITH THE A2 WEBSITE BUILDER
A2 Website Builder is an easy-to-use graphical website builder that allows you to create websites with a professional look without coding. These instructions tell you how to use the A2 Website Builder to get started.
Please follow the following steps if you already purchased the A2 Website Builder with a Hosting Package.
In cPanel, locate the Software section and click the A2 Website Builder
2. On the A2 Website Builder page, click the Create Site button.
3. Additional controls will show upon activation.
4. Click the Login button to start creating your website.
5. You are transferred to the Website Builder after clicking the Login button.
6. The website builder lets you pick a theme, edit any part of the page, and even add a blog or e-commerce feature.
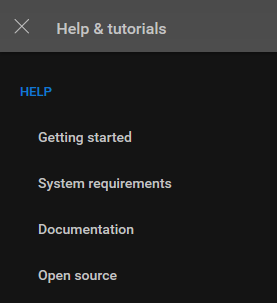
7. Click the question mark icon at the left of the screen to get full instructions.
8. A help menu that offers everything from animated getting started instructions to all open source software licenses used to create the website builder is displayed.
9. Click the X at the upper left of the Help Menu to close it.
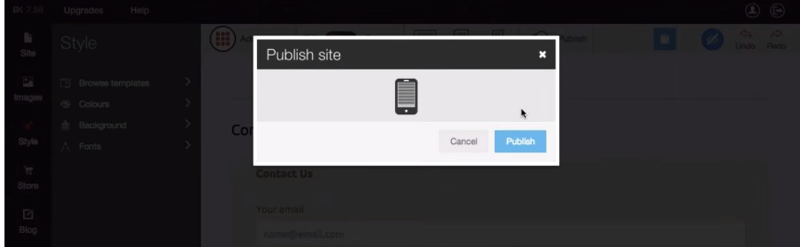
10. When your site’s design is complete, you can preview or publish it using the buttons in the editor’s upper right corner.
GETTING YOUR WEBSITE ON THE WEB
A2 Website Builder assigns a temporary name to the site so that you may see your site while you are working on it. Use the steps below to assign your domain name to it after you have finished creating your website.
1. In cPanel, locate the Software section and click the A2 Website Builder icon.
2. Click Manage on A2 Website Builder tab.
3. On the next page, select your domain from the Map Domain list box.
4. Click the Map button to map the domain.
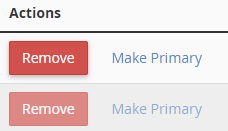
5. Click Make Primary to move the site over to the primary domain next to the actual domain.
6. Your website will be available at your domain within a short time.
Now, let’s discuss how to create a WordPress Website using A2 Hosting.
INSTALL WORDPRESS
The first move is to install WordPress. If you haven’t already ordered a hosting account, that’s very easy. When ordering your hosting package with A2 Hosting, simply pick WordPress-A2 Optimized from the list of auto-installing choices. Once you have set up your account, WordPress will be ready and waiting for you.
If you have already purchased a hosting account with A2 Hosting, you can install WordPress in two ways:
Softaculous: Softaculous is an automated program installer that is supplied by A2 Hosting with managed hosting accounts. With only a few taps, it helps you install a wide variety of applications on your account like WordPress.
Manual installation: WordPress can be installed manually, but this involves some additional setup steps on your part.
Once you have installed WordPress on your account, it’s time to start making your blog.
2. IMPORT CONTENT (OPTIONAL)
This is an optional step. You may already have existing content that you want to import from another blogging application into WordPress, such as raw text or postings. Unfortunately, because there are a vast number of blogging applications, each with its storage format, no one-size-fits-all solution for importing existing content into WordPress is available.
Fortunately, a detailed list of applications and how to import their content into WordPress is given on the official WordPress documentation site. To find out more, visit https:/codex.wordpress.org/Importing Content.
3. CUSTOMIZE WORDPRESS
It would be best if you did some configuration of the site before creating and posting content. With its support for an extensive range of themes and plugins, WordPress makes it simple.
THEMES
The theme offers a site look-and-feel, including fonts, colors, page templates, and more. Thousands of themes are available for WordPress, both free and paid. To see the broad range of themes available, please visit https:/wordpress.org/themes.
After you choose a theme, all you need to do is install it, and your site immediately has an entirely new visual appearance.
PLUGINS Plugins extend and improve the features of WordPress. As with themes, there are thousands of free and paid plugins available. Plugins are available to help enhance protection, generate site statistics, customize image files, and more.
4. CREATE CONTENT
You’ve installed WordPress, and you’ve done some simple site customization. It’s time to get down to the business of actually producing and sharing content!
POST AND PAGES
WordPress separates material into articles and pages:
Posts are chronologically arranged on the home page, with the newest articles on the top. Readers can comment on posts, and posts can also be found in the blog’s RSS feed. (RSS is a simple way to alert readers whenever new content is available on your site.)
Pages include content that is not updated (also referred to as static). Consequently, they are not listed by date and do not appear in the RSS feed of the web. Common examples of static pages are “About me” or “Contact us” pages. A blogging site often is composed mainly of posts, and only has a few static pages.
CREATING A POST
Let’s create a new post for your site. To do this, follow these steps:
Log in to WordPress as the administrator. The dashboard appears.
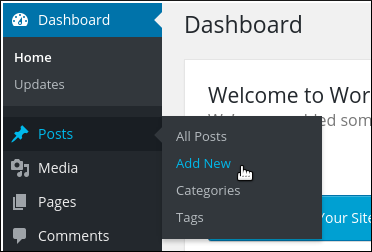
In the left-side pane, click Posts, and then click Add New:
3. Under Add New Post, in the first text box, type a title for the post, such as “Hi mom”:
4. In the large text box, type the content for the post:
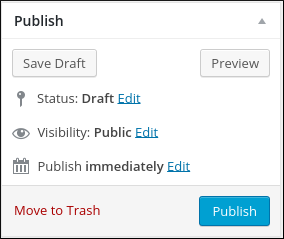
5. The Publish section displays the status of the post:
To save the content as a draft and then work on it later, press Save Draft. Click the Preview button to see how the latest post looks. Since this is a simple example, please go ahead and press Publish. The article will instantly appear on the home page.
CREATING A PAGE Now that you know how to create and publish a post let’s make a new static page. Take these steps to do this:
1. Log in to WordPress as the administrator. The dashboard appears
2. In the left-side pane, click Pages, and then click Add New:
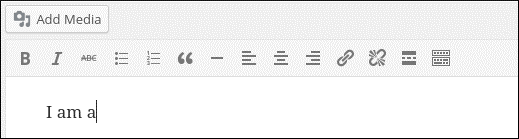
3. Under Add New Page, in the first text box, type a title for the page, such as About me:
4. In the large text box, type the content for the page, such as “I am a thirty-something tightrope walker who likes to read Nabokov by moonlight”:
5. The Publish section displays what you need to know about the status of this page:
To save the content as a draft and work on it later, click Save Draft. To preview what the new page looks like, click Preview. Because this is a simple example, go ahead and click Publish. On most themes, a link to the About me page appears automatically on your site’s home page.
6. MANAGE COMMENTS You will want to enable readers to add feedback and discuss what you have written after you post material. WordPress makes it simple to authorize, delete, respond, and perform other tasks with comments from the user.


A big thank you for your article.
I like the valuable information you provide in your articles.
Good one! Interesting article over here. It’s pretty worth enough for me.
Your site is very helpful. Many thanks for sharing!